Word count: 2104. Estimated reading time: 10 minutes.
- Summary:
- The groundworks are being laid for the house, with a layer of T2 stone crushed rock being installed around the perimeter. This will support the crane dropping in the timber frame panels and other heavy machinery, as well as serving as foundations for the footpath, patio, and driveway. The service popups will be installed later, after their locations have been marked out by a surveyor.
Saturday 16 March 2024: 20:14.
- Summary:
- The groundworks are being laid for the house, with a layer of T2 stone crushed rock being installed around the perimeter. This will support the crane dropping in the timber frame panels and other heavy machinery, as well as serving as foundations for the footpath, patio, and driveway. The service popups will be installed later, after their locations have been marked out by a surveyor.
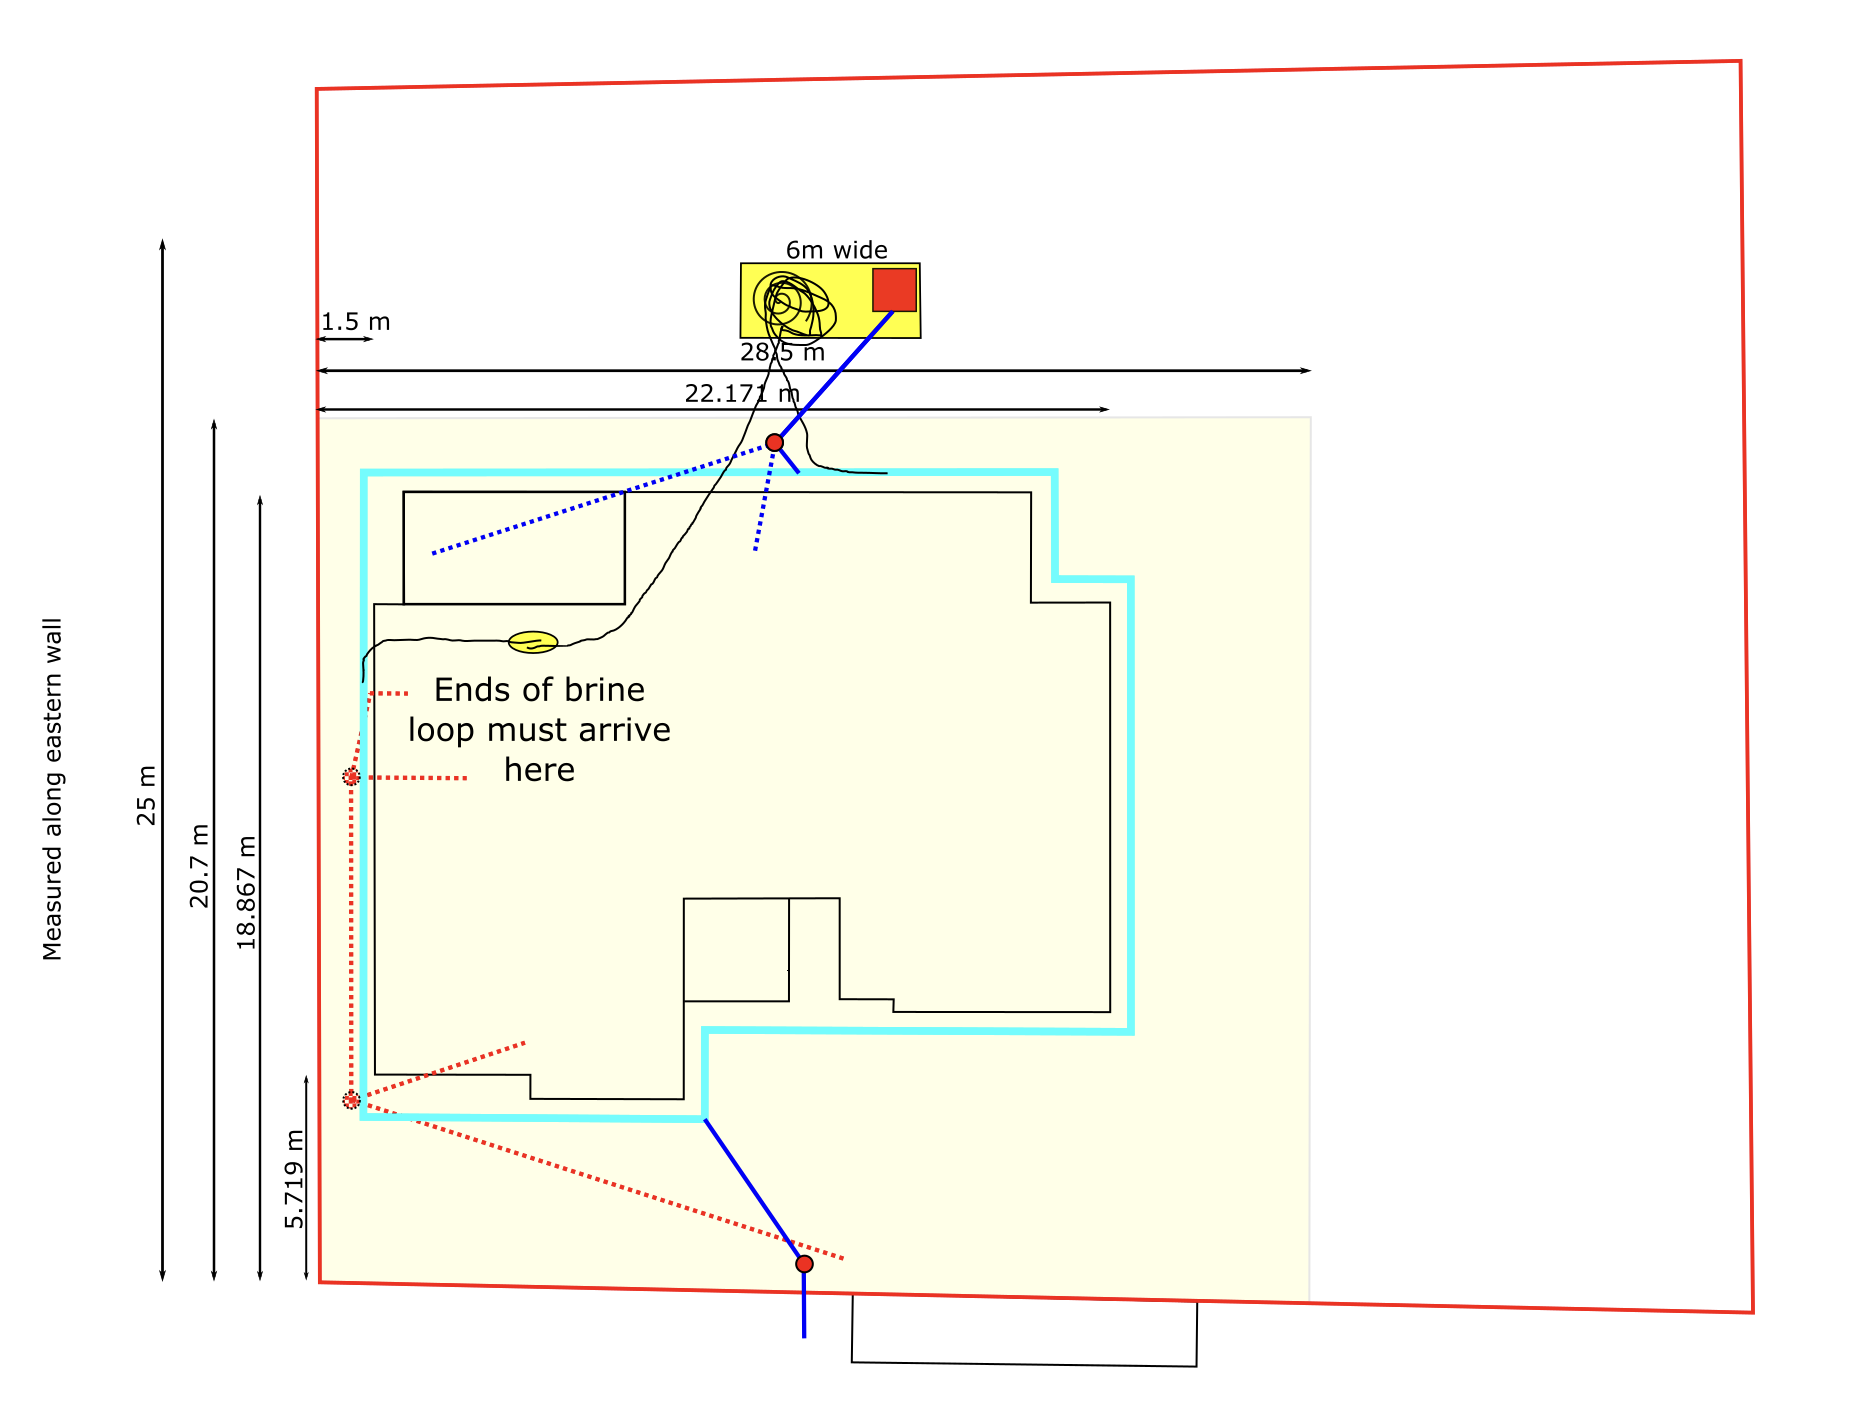
As the structural engineering isn’t done yet, we don’t know the locations of any of the service popups for sure, so we can’t do those. As this will be a raft not strip foundation, there isn’t any deadwork, the house ‘floats’ on a ‘sea’ of chunky crushed rock about a quarter metre deep. In some ways this makes installing the pre-foundations easy – instead of having to pour concrete footings and lay concrete blocks to support the future walls, you just lay (in this case) a 28.5 metre x 20.7 metre x 0.25 metre layer of T2 stone which is crushed rock between 4 and 40 mm in size. On top of that LL Structures our timber frame suppliers will compact and level T3 blinding, which is crushed rock between 0 and 4 mm in size, but that will be after the groundworks guys come back to dig up what they’re about to lay down to install all the service popups, which is some months away yet after their locations have been written into stone (heh!), and a surveyor has come out to mark out the exact locations of every pop up to within one centimetre. According to the groundworks guys, laying it down and then digging it up again is how you achieve exact service popups in any case, it is why raft foundations are ‘not good value for money’ compared against strip foundations, so the work would have to be done exactly as we are doing in anyway. We just have bumped this first stage up to before April 24th to claim the subsidy, that’s all.
As you can see in the diagram above, around the outside of the house there needs to be a land drain about 0.25 m from the outer walls. We need to install this now otherwise rain would fill this hole we are digging with a standing pool of water, which is not good for retaining a solid footing. It will be temporarily connected to a soakaway at the back and to mains stormwater at the front, and that should hopefully keep these sub-foundations from getting waterlogged.
I reckon about 150 m3 of T2 rock will be needed. Assuming 0.75 m3 per tonne, that would be 200 tonnes @ maybe €60 inc VAT per tonne so that’s €12k just for the rock alone. Plus €3-4k for pipes, inspection chambers etc, so €15-16k just for raw materials. Sigh. So much money.
But then, it is rather a lot of space, we shall be filling maybe half the total area of the site. To put it into context:
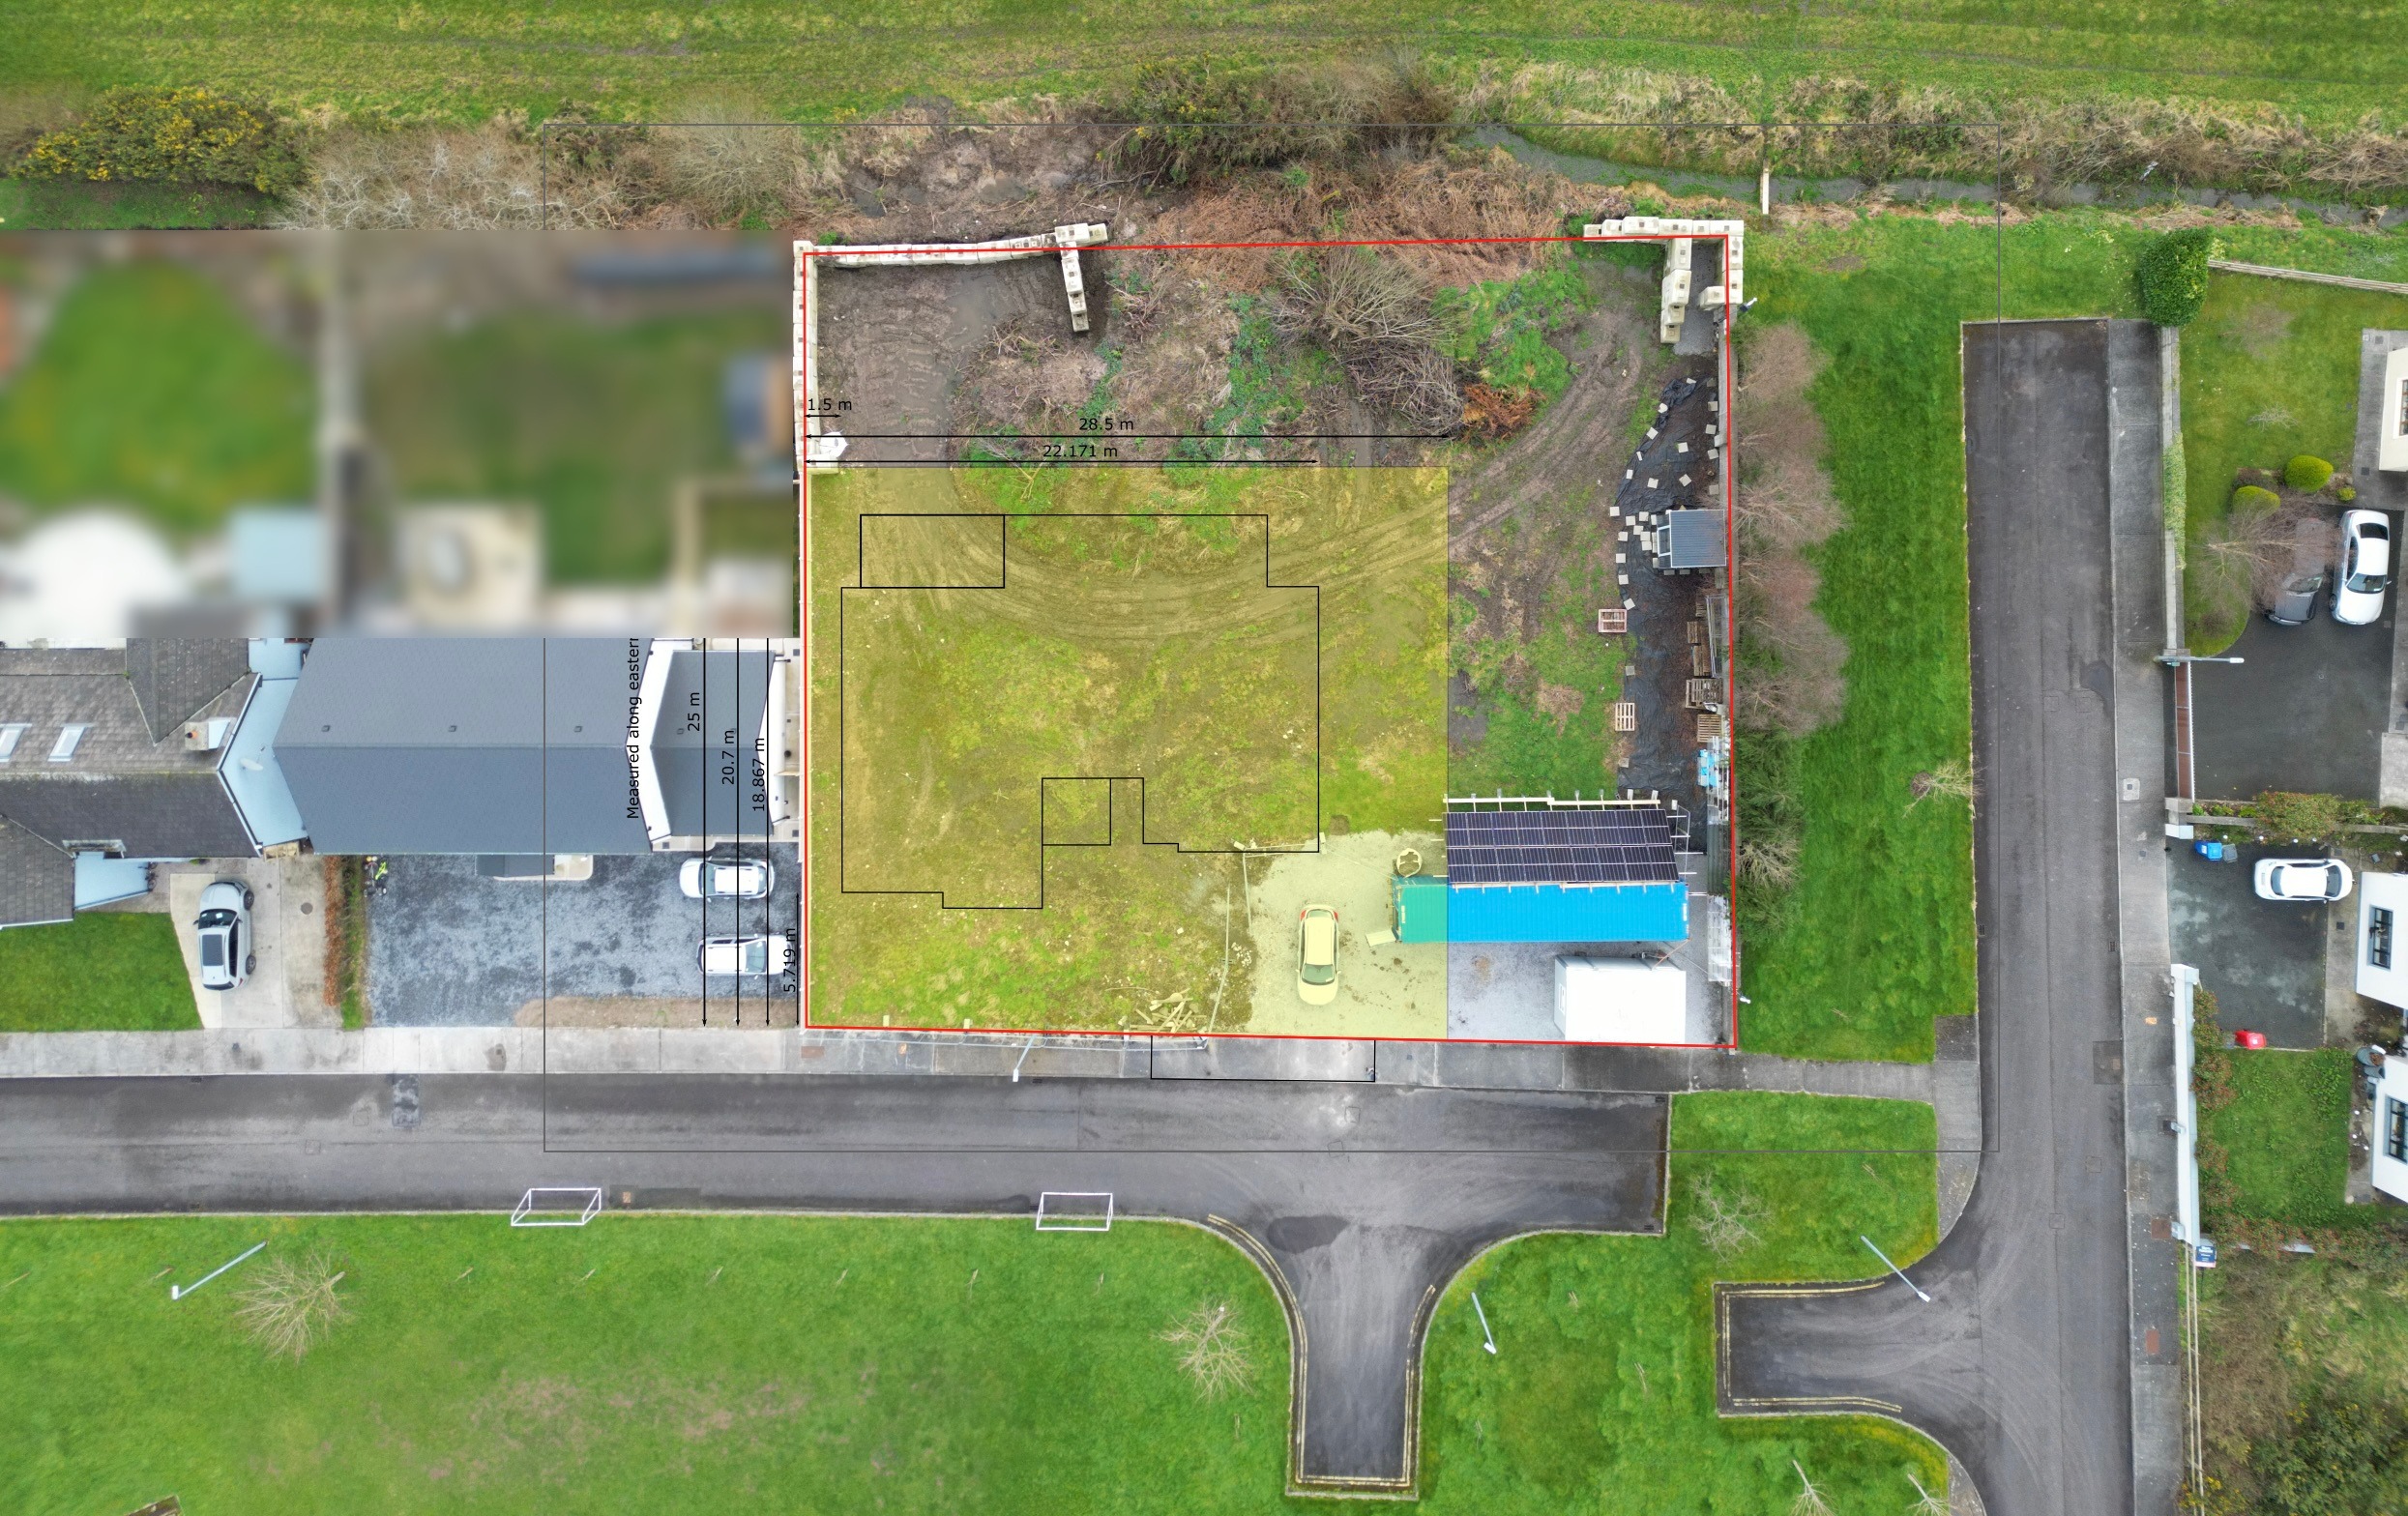
There is obviously a lot of rock going in around the house. This is dual-use – initially it will support the crane dropping in the timber frame panels and the other heavy machinery, however after that it will be the foundations for the footpath surrounding the house, the patio to the west (right of house in this picture), and the driveway to the north (bottom of house in this picture). So all of it will be needed, and none of it will be wasted. If you build a big house, it costs a lot of money!
The aerial photography
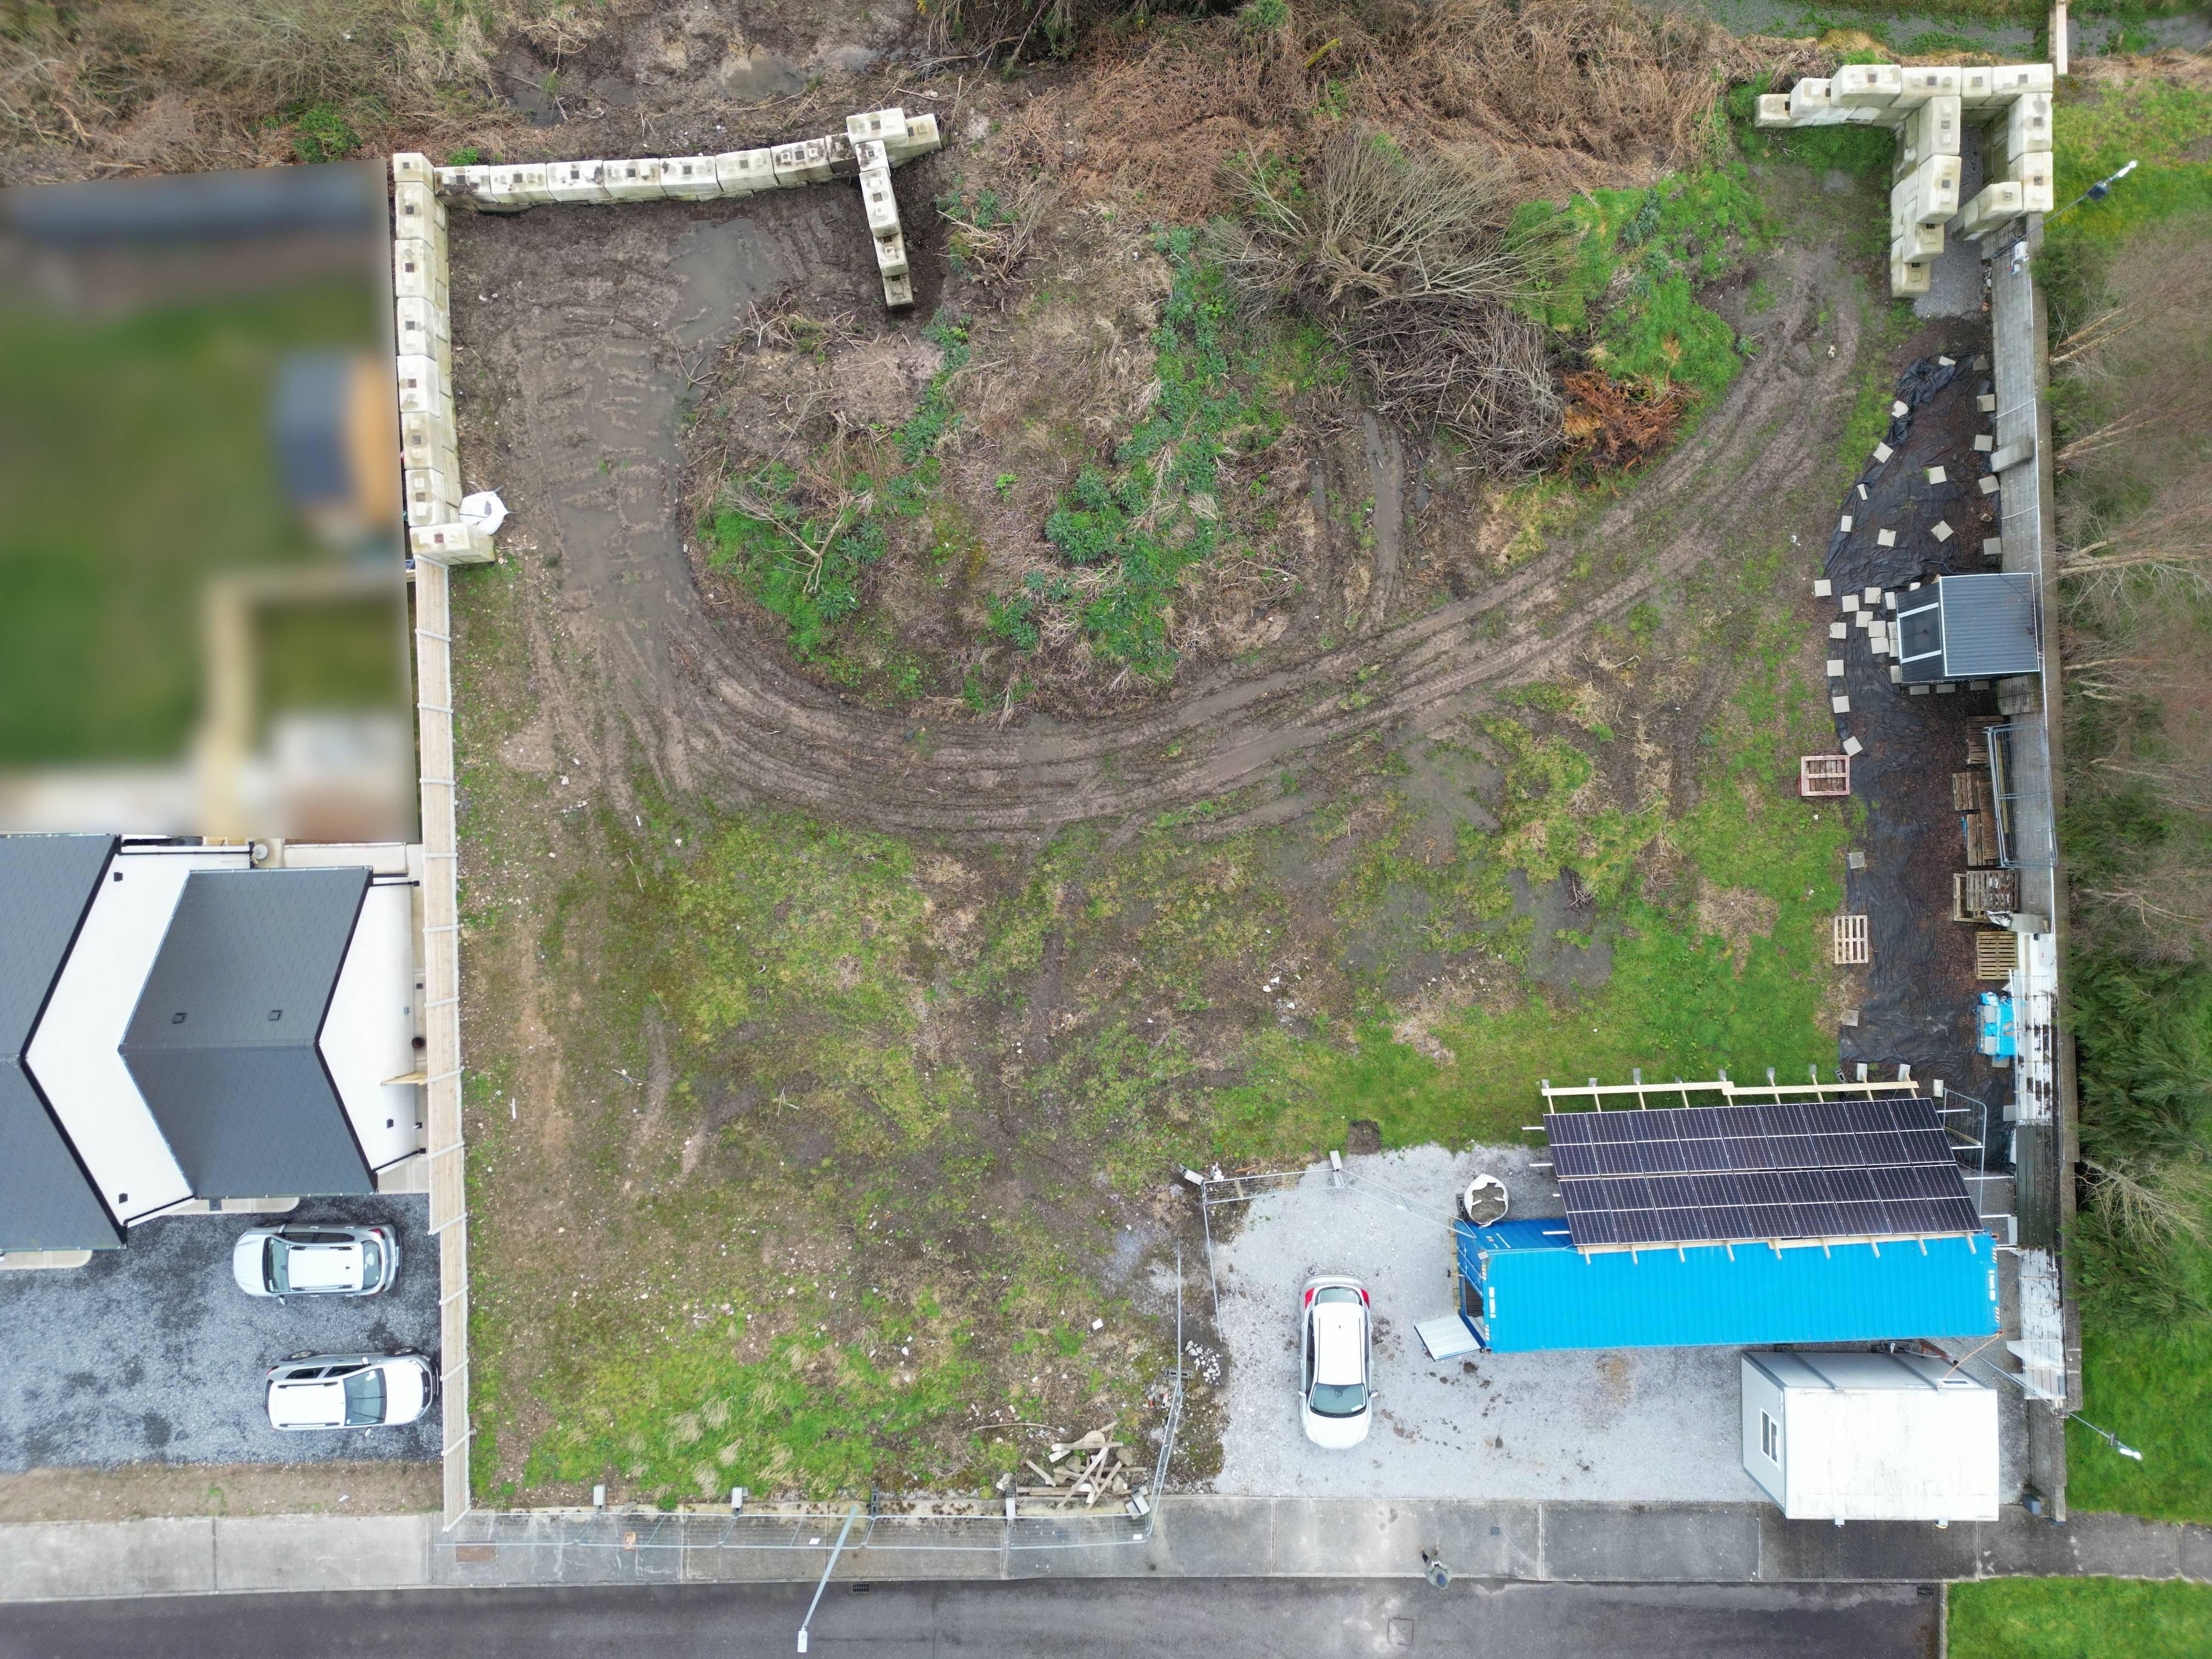
Those who read regularly may be thinking ‘aren’t those fine looking shots from above?’ especially when the satellite images I purchased from startup SkyFi weren’t great. You would be correct – they were taken by a new acquisition of mine, a second hand DJI Mini 3 Pro.
Even purchased second hand, this is not a cheap drone, they cost well over a grand new if purchased with the controller with a screen which saves faffing around with a mobile phone. The money does buy you rather good images though, the picture above is considerably downsampled from its original 48 MP image in which I can clearly see individual leaves on plants. DJI, being the world leader in drones and having overwhelming dominance in the drone market worldwide do come with a price premium, but in return you get a polished experience. Flying the thing is very fluid, very easy and natural. It copes surprisingly well in gusty windy weather, doing a very good job of holding position in all three axes. It has a bunch of safety gear on it to prevent you running into things when flying. It weighs under 250g, which means you are allowed to fly it over people once you have gained your drone pilot’s licence, which I have.
There are some negatives though. The first is the very annoying and completely artificially imposed limitations in features in software – for example, the Mini 3 Pro has the hardware to execute a preprogrammed flight path in 3D space like the Mini 4 Pro, but DJI have locked it out as product segmentation. They do allow a particularly braindead implementation (more on that later) because the hardware is capable, and they may enable the full fat unrestricted implementation in a future firmware update (it wouldn’t be the first time, they have a history of enabling ‘new model’ features on older models after a while), but for now it’s irritating to be locked out by software like this. The second negative is the DJI Fly App, it is huge and very heavy on resources. This is acceptable on a high end smartphone, but they did not fit their screened controller with a high end CPU, so the DJI Fly app on their own DJI RC 2 controller is slow, laggy, and annoying to use. Finally, the third negative is getting everything to register with everything else was far, far harder than it should have been. I ended up having to hard factory reset every bit of DJI hardware from a PC using a USB cable and DJI’s PC diagnostic utility before they’d talk to each other. Maybe that’s the price of used kit, I don’t know, but it made for a very frustrating (and slightly nervewracking) first few days after receiving the delivery. I will say in fairness the internet is chock-a-block full of helpful advice with DJI kit, and I fixed each problem as it arose quickly enough. It just took more time and hassle than it should have in my opinion.
Anyway, onto the preprogrammed flight path facility. This works by you telling the drone to fly between various points in 3D space with various camera angles, recording video as it goes. If you execute this daily, you could build a timelapse video of the house being constructed as you pan around the building because the video would overlay exactly onto the others over time.
As mentioned above, the Mini 3 Pro does have this feature, but it is restricted to an implementation which takes a photo every three seconds as the drone moves very very slowly between the programmed waypoints. It then stiches together the photos to make a video. Here is my last attempt at this, but transcoded down to 720p from the 4K original:
I’ll firstly apologise for the random slowing down and speeding up, that above is my best attempt so far, eyeballing out how to equispace programmed waypoints is harder than it looks.
There are plenty of other issues not my fault though. Firstly, if the sun comes in and goes away during the approx fifteen minute shooting time to generate twenty seconds of video, you get a most unpleasant lighting change between frames as that video demonstrates in full. Secondly, there is no motion compensation applied as there is when recording video normally, so any gusts in wind are very noticeable in the video as things move around more than they should. Thirdly, it just takes so damn long to do the recording, generally consuming most of a battery, for what ends up being a very short video for all that time and effort. Again, what really irks me here is that the hardware is more than capable of that drone whizzing around those waypoints video recording in 4K and 60 FPS with motion compensation running – which would produce vastly vastly better results, and be done in a minute or two rather than me waiting around fifteen to twenty minutes bored.
There is another annoyance – if you really are going to force it taking photos every three seconds, why are they capped to 4K and not giving me the full 48 MP it’s capable of? Then at least I’d get 8K video for all the time it takes. DJI, not that you’ll read this nor care anyway, your artificial software lockouts just suck.
First person view
In addition to the drone, I also purchased the DJI Goggles and DJI Motion 2 joystick controller. Yup, you can become the drone, and fly around rather like a bird or an airplane. I also purchased the wide angle lens which makes more sense for the FPV view, but I forgot to fit it before recording this which as a 4K 60 FPS video is far too big for my website, so here it is on youtube:
This was my very first time operating the thing in FPV, so you probably noticed I got much less jerky in the controls towards the end whereas at the beginning I was like ‘ahhh tree!’ and I yanked it away. I had the safeties on, which limits maximum speed so the collision detection has time to react. Those can be turned off, and the drone will go about twice as fast again.
What isn’t obvious from the video is the effect the googles have on your constitution. I’m fairly tolerant to VR goggles compared to most, I can wear them for an hour or so before they get to me. Well, at least for the Oculus or Google’s now abandoned phone based VR. I can’t say the same for these, even soaring high up over the estate as a bird had me wedging myself against the shipping container as I was finding it hard to keep standing. When I began swooping over the site, I began to feel very unwell indeed. Luckily, I had little in my stomach that morning, and I made myself keep going until the batteries on the drone ran out which was a few minutes after that video ended. After which I felt quite, quite nauseous for several hours, and even watching it again there now it’s bringing back the yacks a bit.
The headset drone experience – at least for me personally – is definitely best had far up in the sky ideally sitting down on a chair. The goggles do head tracking, so you can look around in 3D as if you were in VR, and in fairness to DJI it’s pretty seamless, though I suspect the likely hundreds of milliseconds of latency needed to actually physically turn the drone to match your head is what induces the disorientation. I could definitely see me using them to experience spectacular nature as if a bird, and I can see them being useful when checking the build of the house, so I’ll be keeping them, at least for now.
Indeed, I didn’t spend all this money on drones and accessories just for aerial photos and pretty timelapses. It will be used during the build to inspect the work being done in order to save me having to climb up onto the scaffolding or put up ladders. I don’t care for heights, plus it’s time consuming to set up and tear down height scaling equipment. It is much quicker just to fly the drone nearby and use its excellent camera to zoom in, and that’s the principle reason I bought it.
All the testing so far indicates my research was accurate, and it is more than fit for this purpose, especially as it will also fly indoors which lets me checking the roof of the vaulted ceilings without having to bother with the scaffolding tower. I think it’ll get good use and save me a lot of time and hassle.
| Go to previous entry | Go to next entry | Go back to the archive index | Go back to the latest entries |