It turns out to actually be surprisingly easy though there is almost zero documentation on the topic. I have an Apple Airport Extreme 802.11n base station which has an IPv6to4 tunneller built in - lots of kit nowadays does too including any recent Windows or Linux box. All you need to do is to give it some IPv6 routing information and it will broadcast the IPv6 information to all computers running inside your home based NAT such that any IPv6 capable machines will be allocated an address. One therefore effectively duplicates all your NAT contained machines onto the internet under IPv6 by "tunnelling" the IPv6 traffic via the Airport Extreme through the IPv4 ADSL connection to the tunnel broker on the internet where it gets decoded back into IPv6 and sent on into the internet. Note that this works even if your Airport is not your NAT nor you are using its WAN port - in my case, it handles my DHCP but nothing else. You may however need to configure your NAT to route inbound 6to4 packets to your Airport Extreme - though I personally didn't have to.
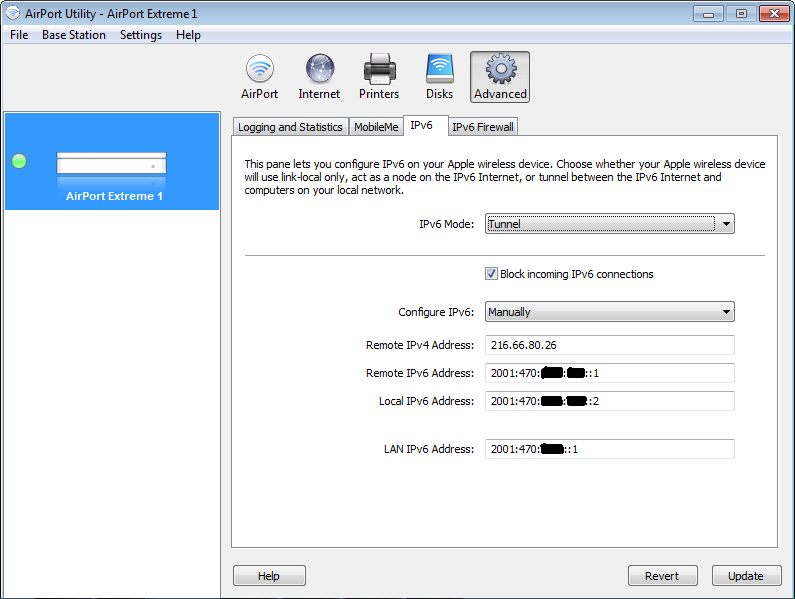
Firstly, go sign up at http://www.tunnelbroker.net/ and after you have verified your email, create a tunnel from the website giving the IPv4 your ADSL modem uses as its IPv4 endpoint. You'll now get a page of config information: you want the Server IPv4 address, Server IPv6 address and Client IPv6 address to enter into the Airport Utility (Advanced Page => IPv6, choose the Tunnel option from the drop down menu) but you'll be missing the bottom item which is the LAN IPv6 Address.
To obtain this missing item you need one other thing: a range of addresses for the Airport Extreme to distribute. Back on the tunnelbroker webpage there is an option called "Routed /48" which has an "Allocate" link - simply hit that Allocate link and you'll get back a shorter IPv6 range. You then enter this shorter IPv6 range into the Airport Extreme's LAN IPv6 Address section, but appending a '1' to it:
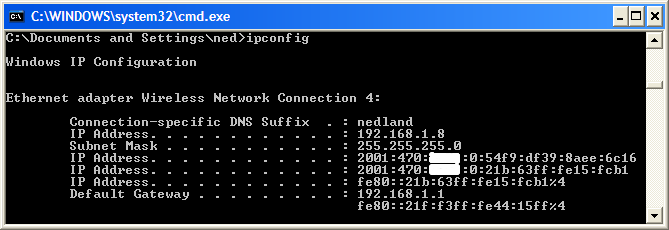
After you hit update and the Airport Extreme reboots, all your NAT based machines should automagically obtain an IPv6 allocation. This is slightly hard to find in Windows XP (with the IPv6 protocol installed), but it's there if you open a command box:
And just in case you really need proof it's working, visiting http://www.whatismyipv6.net/ yields:
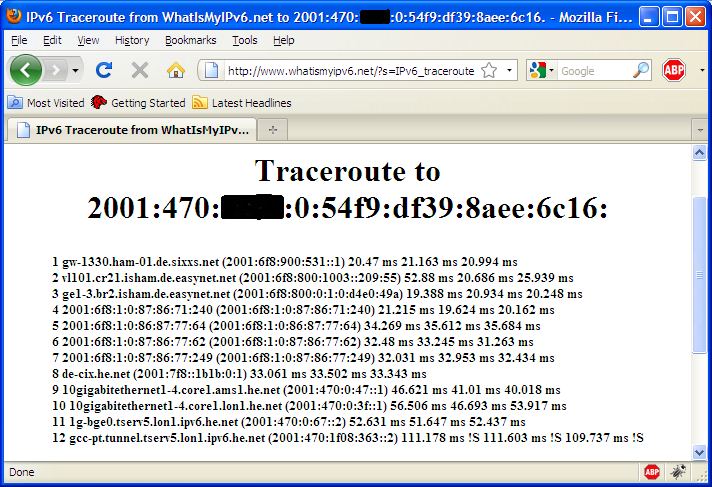
Any modern web browser should already support IPv6. As I am sure you can see, the website is tracerouting 2001:470:XXXX:0:54f9:df39:8aee:6c16 which is the IPv6 of my Windows XP box as shown in the command box above! Yay!